- Secure order
- Easy return shipment
- Service-Hotline +39 02 3045 5879
Instructions No. 3652
Difficulty: Advanced
Working time: 8 Hours

Preparation and materials
Before you get started, make sure you have all the materials you need ready. Your creativity can only really flow if you are well prepared.
Step 1: Attaching the suspension
First of all, unscrew the eyelets of the suspension on the back of the sign. This will make it easier for you to place the wooden panel crosswise later.


Step 2: Template and primer
Next, print out our free template, which you can download from our website. It will serve as a template for your StringArt motif. Take the wooden board and prime it with black handicraft paint or your preferred color. This primer will create a high-contrast background that will make your StringArt stand out. Allow the paint to dry completely before continuing.
Step 3: Transferring the template
Once the paint has dried, place the carbonless paper on the wooden board and place the printed template over it. transfer the motif to the board with a pen. This will give you clear lines that you can use as a guide for the next step.
Step 4: Placing the steel pins
Now it gets exciting! Insert the steel pins along the outer lines of the transferred lettering. Keep a distance of about 5 mm between the individual needles. These serve as anchor points for your yarn.
Step 5: Attach yarn
Attach the yarn, by knotting it to one of the steel pins. Now start pulling the thread back and forth between the different needles . Play with the thread tension and the gradient until the letter is clearly legible and the desired pattern appears. Finally, knot the end of the yarn to secure it.
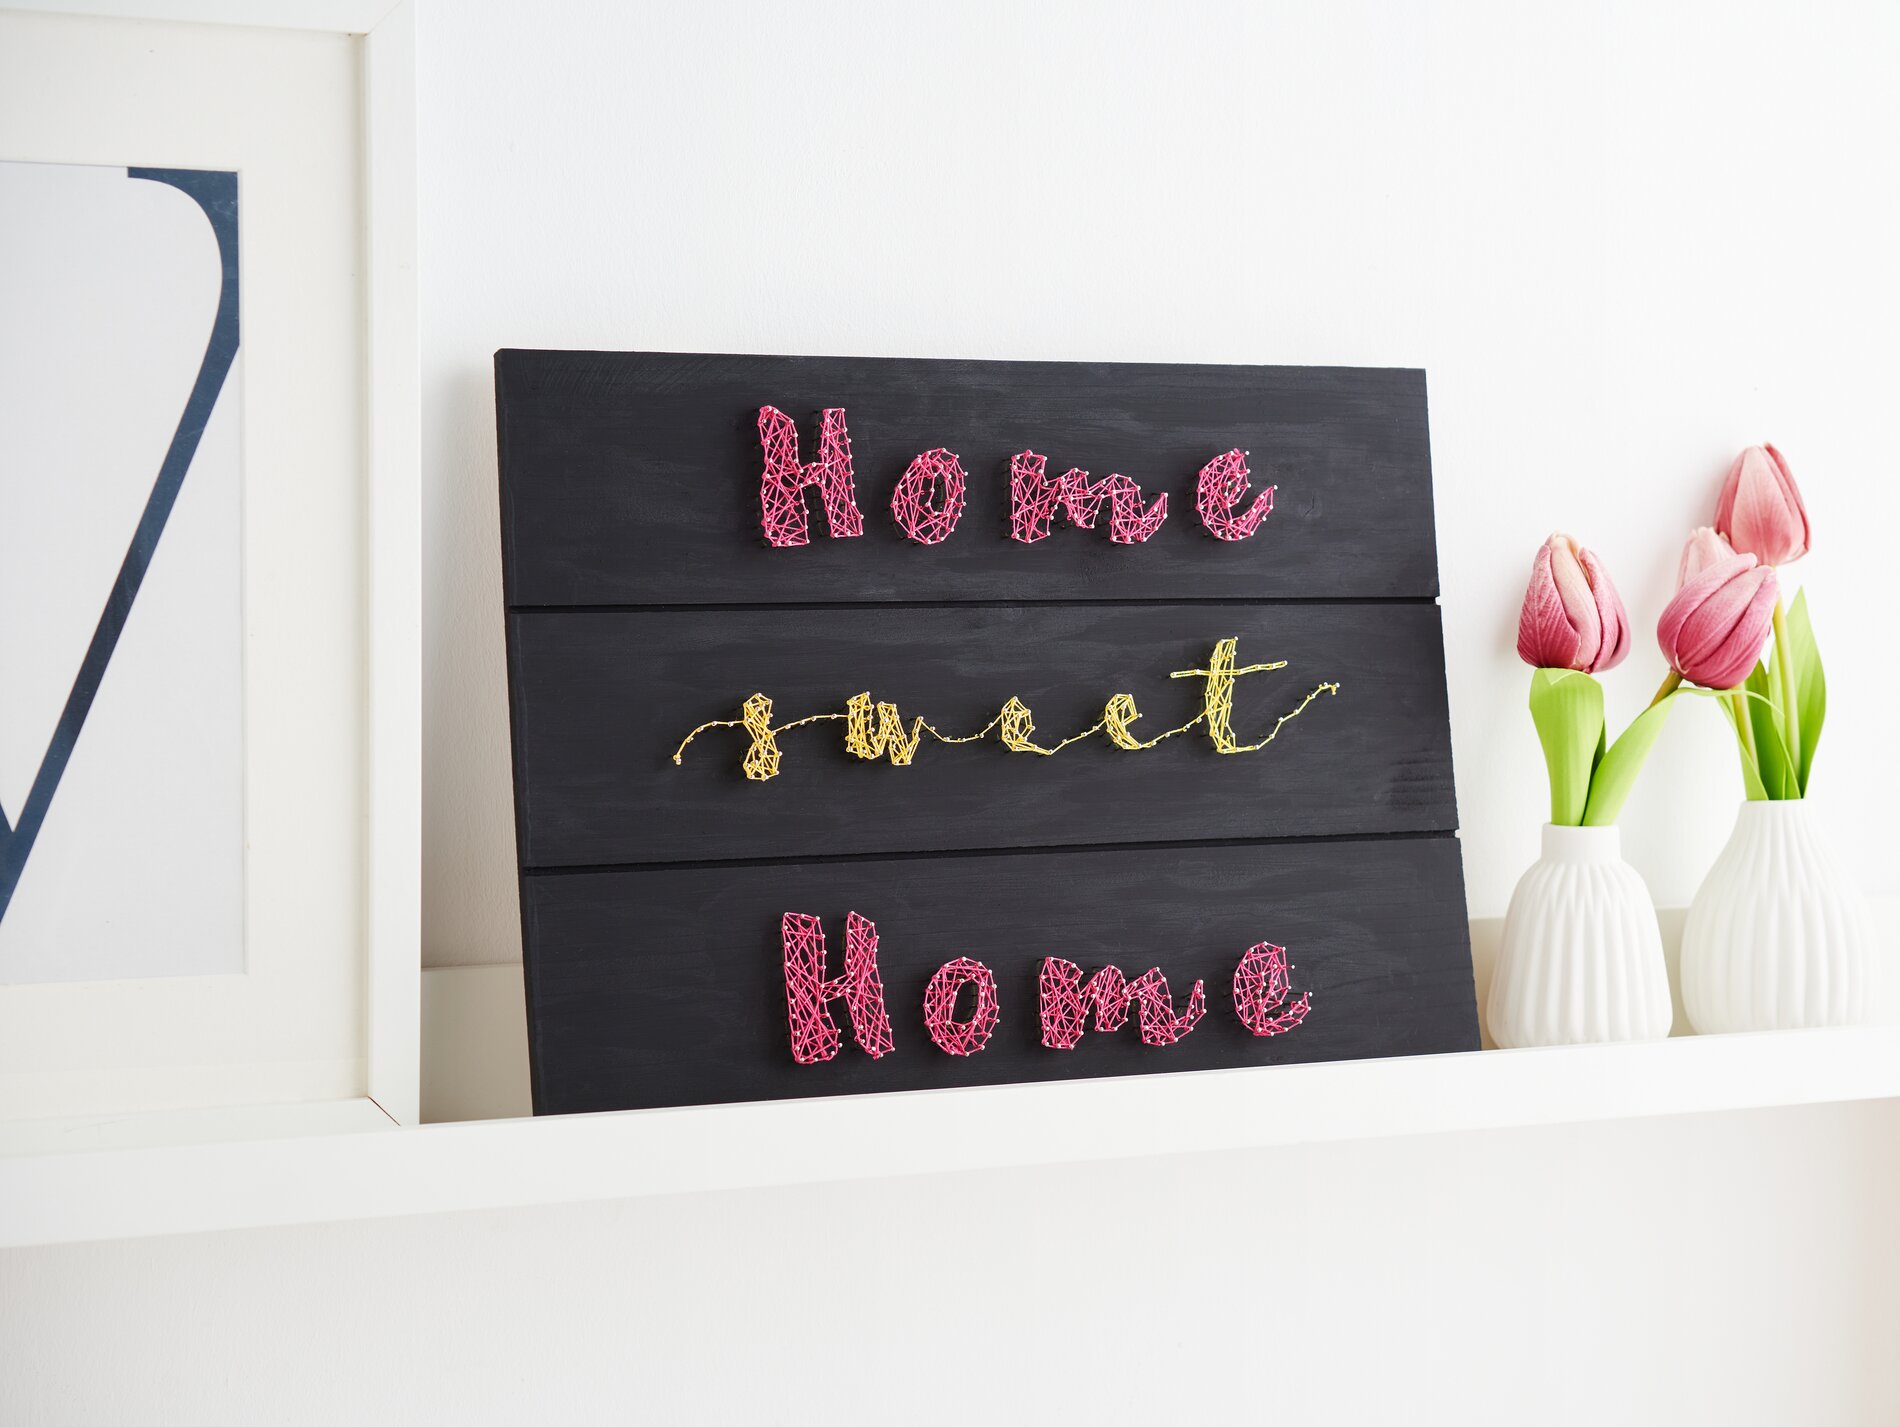
Your impressive StringArt decorative panel is now finished! It is not only a decorative highlight, but also an expression of your creative skills. If you would like to create more projects like this, visit our online store. There you will find all the materials you need for your creative projects. Start your next DIY-Adventure with high-quality craft items from our range!