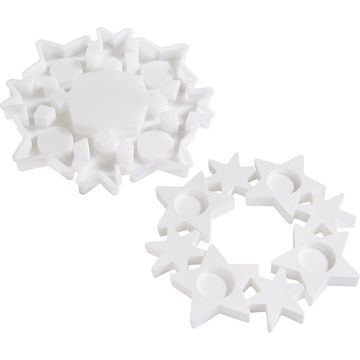
Cast a Tealight Advent Wreath with KeraHobby and Decorate It Naturally
First, set up your workspace: a smooth, easy-to-wipe surface for protection and some water for mixing. This way, you can relax and enjoy casting with KeraHobby while keeping your workspace clean as your Advent wreath takes shape step by step.
Step 1: Mix the casting compound—for a smooth, sturdy surface
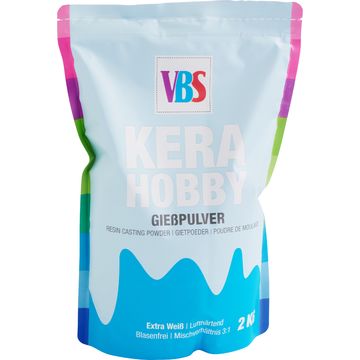
Mix KeraHobby with water to form a creamy mixture. The consistency should be thick enough to neatly fill the details of the silicone mold. If you mix it thoroughly without any lumps, the surface will later appear even and seamless.
Step 2: Fill the silicone mold – for clean stars and edges
Slowly pour the mixed mixture into the “ silicone mould. ” mold. Then gently tap the mold a few times on the work surface. This allows air bubbles to rise to the top and helps define the fine contours. Smooth out the surface so that the wreath lies flat later and can be decorated securely.
Step 3: Let it dry and remove from the mold without breaking it
Let the cast piece dry for about 1 hour . After that, it will be sturdy enough for you to carefully remove the molded piece from the mold. To remove it from the mold, gently bend the silicone mould apart and release the wreath piece by piece. Take your time doing this: Especially in narrow areas, the result will look best if you don’t pull on it but instead press the mold away from the cast piece.
Step 4: Let it dry completely—for a secure bond when gluing and decorating
Now your KeraHobby wreath needs some rest. Let it dry thoroughly for another 8 hours. This step is important so that the mold hardens completely and can later securely hold hot glue, decorations, and tea lights.
Step 5: Prepare the base—a natural look with moss
Turn a decorative bark bowl upside down so that the surface serves as a stable “ coaster .” Cover the bottom with sheet moss. The moss acts as a soft, natural cushion and creates a harmonious transition between the wood look and the cast Advent wreath.
Place the dry wreath in the center of the moss. Make sure it doesn’t wobble. If everything lies flat, the decorative elements can be neatly arranged later, and the tea lights will stand securely.
Step 6: Decorate with orange slices, cinnamon, berries, and pinecones—for an Advent scent and texture
Arrange dried orange slices, cinnamon sticks, berries, and pinecones around the wreath. Work in small groups: place an orange slice next to two cinnamon sticks, add a pinecone, and finish with a touch of berries. This creates a balanced overall look with varying heights and a warm, Advent-inspired color scheme.
Step 8: Secure with hot glue—so everything stays durable for everyday use
Once you’re happy with the arrangement, secure the elements with hot glue. Apply the glue in small dots so it remains invisible. Press each piece briefly until it sticks. This way, your decoration stays secure even when you move the wreath around, and the Advent wreath still looks natural.
Step 9: Place the tea lights—arranged safely and harmoniously
Finally, place the tea lights in their designated spots on the wreath. Make sure there’s enough space around the flames— moss, —from orange slices and other natural materials . This way, your tea light Advent wreath not only looks harmonious but can also be used safely.
Your Finishing Touch
If you’d like to mix things up, you can add to or swap out the decorations depending on the week of Advent—the cast KeraHobby wreath remains the calm, modern base. You’ll find everything you need for casting, decorating, and adding the finishing touches in the online shop—stop by and get started on your next Advent project right away.