- Secure order
- Easy return shipment
- Service-Hotline +39 02 3045 5879
Instructions No. 4040
Difficulty: Beginner
Working time: 2 Hours

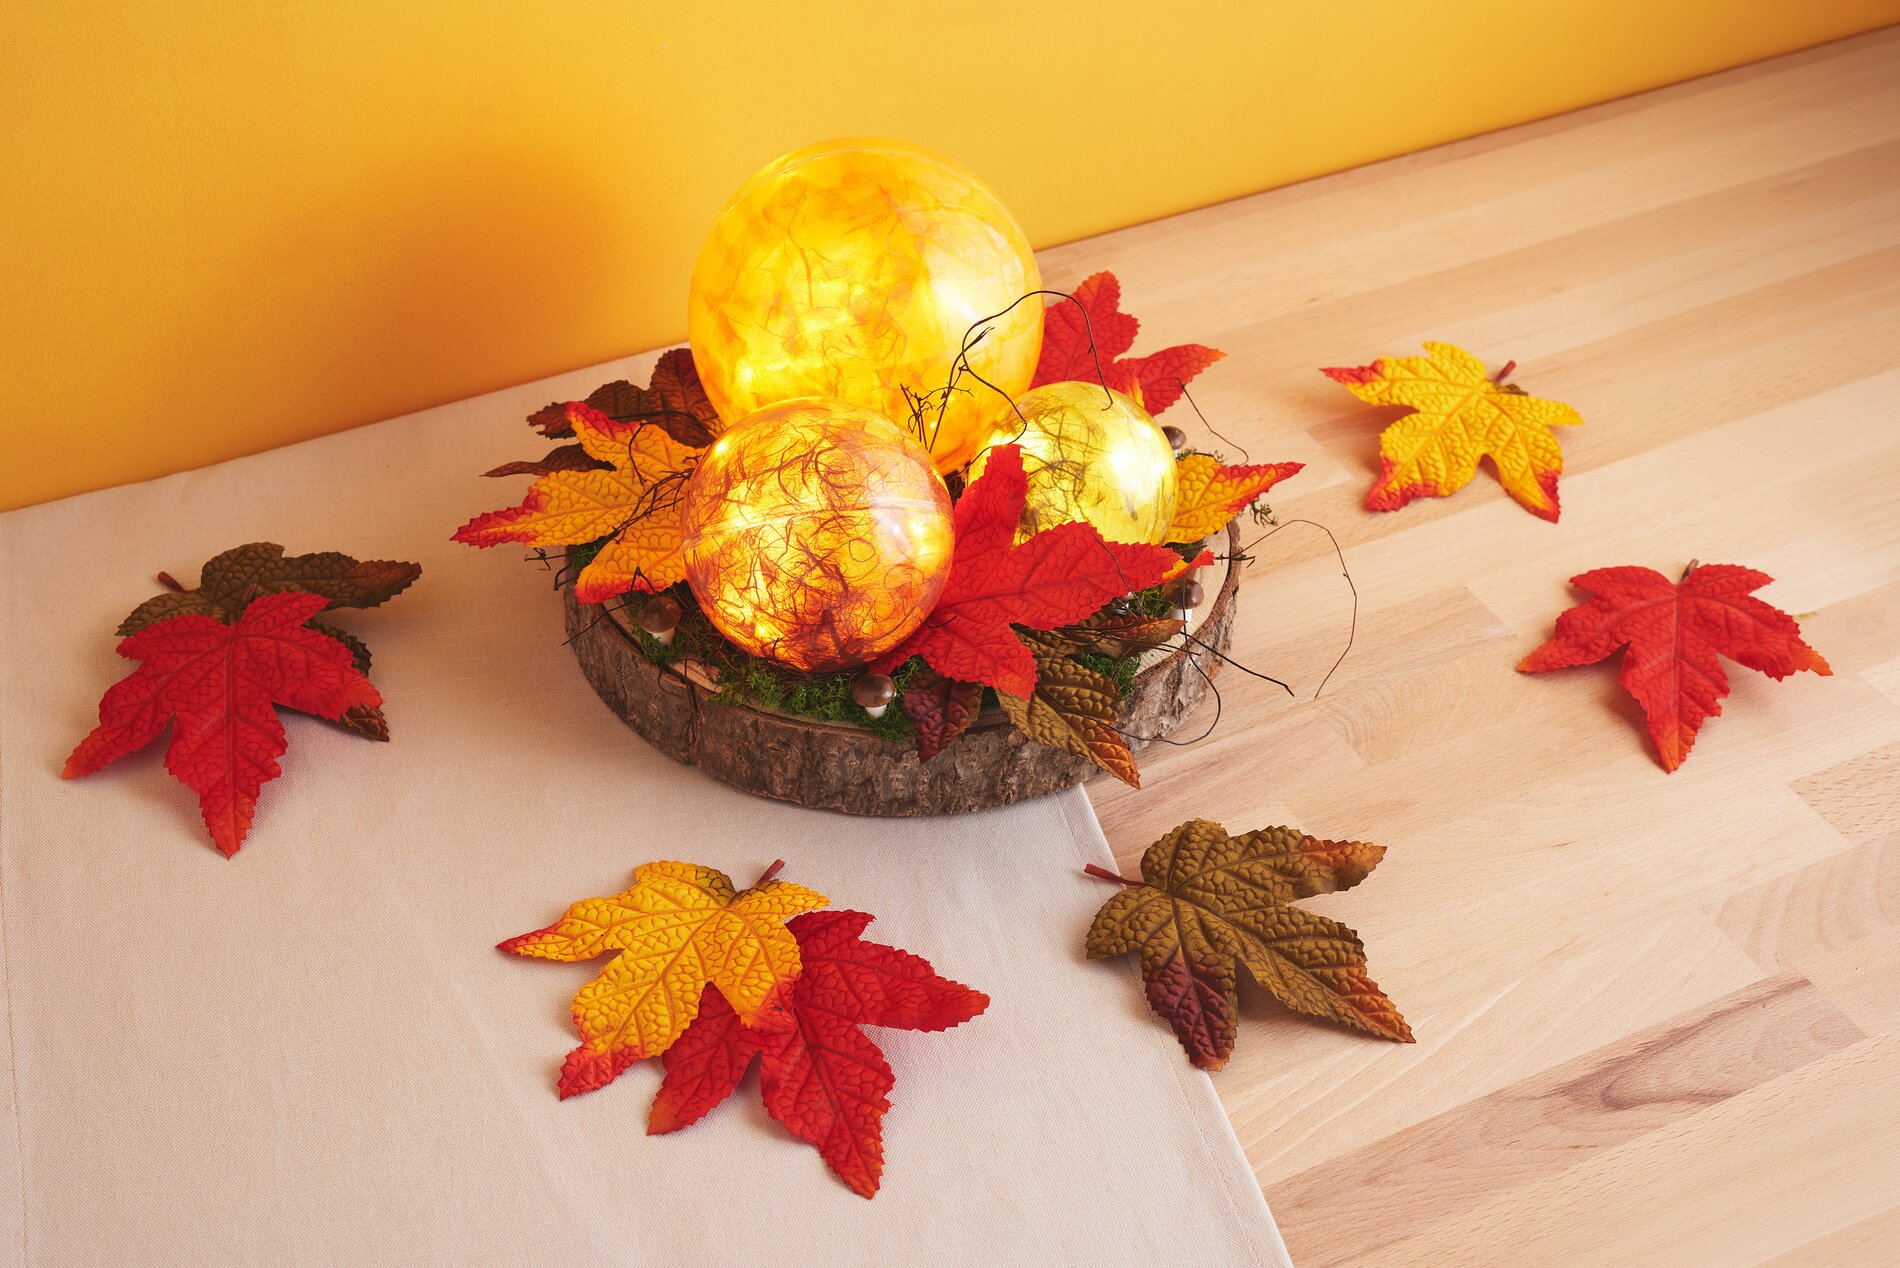
Arrange Autumn-Themed Glow Balls in a Moss Bowl
Set up a clean work surface and have a pair of tweezers and small scissors ready. For this beginner-friendly fall-themed project, you’ll be working with clear acrylic balls with a hole, straw silk paper , and a micro-LED-chain of light.
straw silk paper Preparing for the natural lighting effect
Tear the straw silk paper into small, irregular pieces. Tearing is intentionally better than cutting here: this creates fine, fibrous edges that will softly diffuse the light later and produce a lively, autumnal texture.
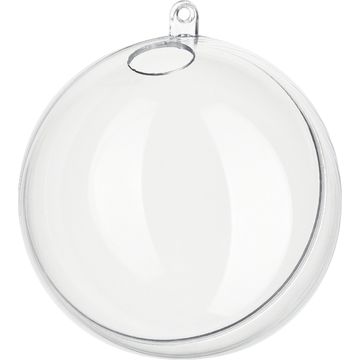
acrylic ball Glue from the inside (napkin technique)
Open the “ acrylic ball ” and glue the pieces of straw silk to the inside using “ napkin varnish .” “ napkin varnish ” is a transparent adhesive and varnish in one: It secures the material and, once dry, ensures that the surface looks even and the fibers appear beautifully “embedded.” Work your way along piece by piece until the inside of the ball is attractively covered.
Let it dry and trim the edges cleanly
Let the napkin varnish dry completely. Then carefully trim off any excess edges and clear the hole. Tweezer scissors work especially well for getting into the curves and allow for a clean cut. Clearing the edges is important so that the ball can close precisely later and the wire from the chain of light can be easily threaded through the opening.
Insert the Micro-LED-chain of light and close the sphere
Thread the wire from the Micro-LED-chain of light through the hole into the ball. Loosely shape the wire into arcs inside the ball so that the lights are evenly distributed and don’t all cluster in one spot. Then carefully close the acrylic ball again. Repeat these steps until you have prepared all the light balls in the desired sizes.
Add an autumnal touch to the bowl and build up texture
Line the bowl with Iceland moss, leaves, and decorative willow. Iceland moss adds volume and conceals the base, leaves provide typical fall colors, and decorative willow gives the arrangement delicate lines and a natural “forest” feel. Press everything down gently to create a stable base on which the “ acrylic balls ” will rest securely later.
Arrange the light balls and hide the battery boxes
Place the decorated “ acrylic balls ” on the bed of moss, arranging them so that the different sizes look harmonious. Pull the battery compartments of the chains of lights to the back of the shell so that the technical components are visually set in the background. If you’d like, secure the battery boxes with a small dot of hot glue to prevent them from shifting when you rearrange the display.
Hide the Cables and Add Finishing Touches
Hide the cables with a little moss, until the decoration looks calm and natural from every angle. Remove the wire from the mushrooms and glue them into and onto the bowl as you like. Arrange them so they look like little finds from the forest—among leaves, at the edge of the moss, or as an accent next to a light ball. This creates a harmonious fall decoration with warm light and plenty of depth.
Finish: Check the lighting effect and secure the arrangement
Turn on the Micro-LED-chain of light and check the light distribution. If an area appears too bright or too dark, move the orbs slightly or reshape the wire inside.
Now it’s your turn
Once you’ve finished arranging your light balls in the bowl, browse the online shop for more natural materials, -compatible chains of lights and seasonal decorative elements to expand your fall decor in a style that’s all your own.