- Secure order
- Easy return shipment
- Service-Hotline +39 02 3045 5879
Instructions No. 4157
Difficulty: Beginner
Working time: 20 Minutes


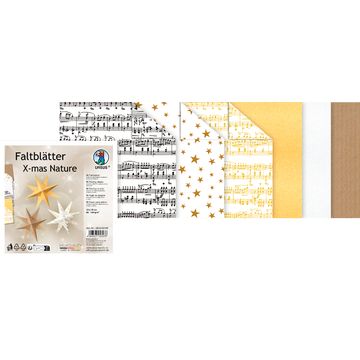
First, print out the template and set it aside within easy reach. This way, you can cut out all the star pieces identically, and the paper star will look even in the end. For one star, use five or six squares from the folded sheets, depending on how full you want it to be. With six pieces, the star will be denser; with five, it will look a bit airier.
Pre-fold the squares: clean fold lines for a sturdy shape Place a square in front of you and fold the bottom edge over the top edge. Smooth out the edge well (this is called “pre-folding”) and open the Paper again. Repeat this with the right edge over the left, then open it again. Flip the sheet over, fold it diagonally once, and open it again. These pre-folds are your “guides”: they ensure that the Paper can be folded together precisely later and that the star points will be nice and sharp.
Fold into a small square: fold the diagonal inward Now the flat square becomes a compact base shape. Fold the Paper along the pre-folded lines into a small square. As you do this, press the diagonal fold inward—this creates a sort of “tucked-in” edge. Take a moment here: If the corners lie neatly on top of each other, you’ll be able to see this clearly later on the finished paper star.
Place the template, trace, and cut out Place the template on the folded square. Alignment is important: The tip of the diamond should point toward the open corner of the folded square. This ensures that the star’s “ lace ” will be in the right place. Trace the outer lines and then cut out the piece with scissors. Don’t unfold it—you need the folded shape so that all the star pieces remain identical. Repeat this for all five or six squares.
Gluing the star pieces together: Layer by layer to form a “stack” Now glue the cut-out star pieces together to form a compact “stack.” Make sure the edges are flush and the “ lace ” point in the same direction. The goal is to create a stable center that can later be fanned out without the star becoming crooked.
Attaching the hanger: " chiffon ribbon " and wooden bead Cut a " chiffon ribbon " into two pieces of equal length. Glue both pieces of ribbon vertically and centered on the two outer sides of the star. This creates a hanger that keeps the star in shape when opening and closing it. Using the template, cut two diamonds from the remaining folded sheet and glue them so they align perfectly on both outer sides. These cover diamonds hide the glue joints and give the paper star a clean finish.
Open and secure the star: pearl up, fan out the points, pearl down. Thread a wooden bead onto both chiffon ribbons and tie the ribbon ends in a knot. To open it, slide the pearl up so the pieces have room to move. Carefully fan out the points until the star stands evenly, and slide the pearl back down. This secures the shape and keeps your Christmas star made from Paper stable.
Christmas Tip: A Paper Star as a Gift Tag with a Double Purpose Use the star as a stylish gift tag—it instantly adds a festive touch to any package. After unwrapping the gifts, the paper star can simply be hung up as a decoration. If you’d like to add matching folding sheets, ribbons, and beads, stop by the online shop and put together your next paper stars at-Selection .